Introduction
In some cases it may be necessary to modify the mileage value on a tracking device. There are four methods available, each suited to different scenarios.
Method | TT2 Only? | Service Providers Only? | Location |
Advanced Configurator | No | No | Local (USB) |
SMS Command | No | No | Remote |
Vehicle Details | Yes | No | Remote |
Calculated Inputs | Yes | Yes | Remote |
⚠️ Warning: The mileage correction function is not available for Flespi Teltonika devices. It is only available for Ruptela devices. If you need this feature for other device types, contact Technical Support to register a new feature estimation.
1 Advanced Configurator
This method requires physical access to the device via a USB cable. It allows you to set the internal Virtual Odometer value directly.
Connect the device to your computer using a USB cable.
Open Device Center and switch to Advanced Mode.
Select the correct COM Port and click Connect.
Navigate to Tools > Set Virtual odometer.
You can now enter the new Virtual Odometer value in meters. For more details, see the Advanced Configurator documentation.
2 SMS Command
This method allows remote mileage correction by sending an SMS command to the device. No platform access is required.
For full compatibility details and command syntax, refer to the setvalue SMS command documentation.
3 Vehicle Details - Mileage Correction (TrustTrack2)
This method is available only for TrustTrack2 users. It lets you correct the mileage directly from the platform interface and view a history of previous changes.
Log in to your TrustTrack2 account.
Go to the Fleet Status menu.
Select the target object.
Navigate to Summary Overview > Vehicle Details.
Hover over the current mileage value. An edit icon will appear.
Click the edit icon to open the correction menu.
Enter the new mileage value and the date from which to apply the correction.
Click the ✓ icon to save the change.
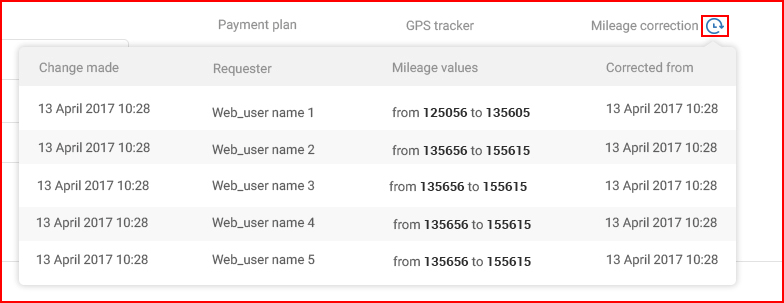
You can view the history of previous changes by clicking the history icon next to Mileage correction. Up to 5 recent changes are displayed.

3.1 Mileage Correction Rules and Requirements
Rule | Detail |
Frequency limit | Once per 24 hours per vehicle |
Backdating limit | Up to 35 days in the past |
Permission | Administrators only |
"Virtula Odometer" parameter used | Vehicle must send mileage from the Virtual Odometer (CAN, OBD and TCO mileage can't be recalculated this way) |
Device model | Only Ruptela devices supported |
4 Calculated Inputs (LCM)
This method uses the Calculated Inputs feature in the LCM Admin Panel. It allows you to apply a custom formula to adjust the mileage parameter. This is the only method available to Service Providers.
Log in to your LCM account.
Go to Objects.
Search for the target object and click View/Edit.
Scroll down to the Calculated Inputs section.
Open the Mileage calculated input.
Select the Custom function.
Enter a formula to adjust the mileage value by adding or subtracting the desired amount.
Click Save.
The example below adds 10,000 km to the mileage. It uses the Virtual Odometer parameter and converts meters to kilometers:
💡 Tip: If you need the new formula applied retroactively from a specific date, use the recalculation feature.